


A failed compile can mean a missing character, broken textures, a map that won’t load, or an animation that never makes it into a finished video. The tricky part is that SFM Compile doesn’t refer to just one operation. It can mean preparing custom assets for Source Filmmaker or rendering your completed animation into a usable file.
Understanding that difference will save you time. Instead of changing random settings or reinstalling tools, you can identify what needs to be compiled, choose the right software, and follow a workflow that fits the problem.
This guide covers the complete process, from preparing custom models and textures to compiling maps, troubleshooting common errors, and exporting your final animation. It’s written for beginners, but the practical explanations should also help experienced SFM users organize their workflow and avoid unnecessary mistakes.
What Does “SFM Compile” Mean? (Two Different Workflows)
SFM Compile usually describes one of two processes. The first converts source assets into formats that the Source Engine can use. The second refers to producing the final video from an animation created in Source Filmmaker.
These processes are related to the same creative workflow, but they use different tools and produce different results.
Asset Compilation: Models, Textures, Animations, and Maps
Asset compilation prepares a custom character, prop, or environment for use in Source Filmmaker.
For example, you might create a character in Blender, export its geometry, prepare its materials, and compile the model into the formats required by the Source Engine. A custom map follows a different process: a map created in Hammer Editor is compiled into a BSP file that the engine can load.
Common file formats include:
- SMD and DMX for model geometry, skeletons, or animation data.
- QC files for defining model compilation instructions.
- MDL and associated files for compiled models.
- VTF and VMT for textures and material definitions.
- VMF for editable Hammer maps.
- BSP for compiled maps.
The exact requirements depend on the asset, the tools involved, and the Source Engine branch you’re targeting.
Valve’s StudioMDL documentation explains how the model compiler converts supported intermediate data into Source model files. The important point is that exporting a mesh from a 3D program doesn’t automatically make it ready for SFM.
Movie Export (Layoff): Rendering Your Final Animation
Movie export happens after your animation is ready. You’ve placed the characters, adjusted the camera, added lighting, timed the movements, and completed the scene.
Now the application must render the frames and, when applicable, export audio.
Rendering can take considerably longer than previewing a scene because the final output may use higher-quality settings. The finished result can be a video file or a sequence of individual images that you assemble into a video with editing software.
This distinction matters. If a custom model won’t appear in the animation, changing the movie export settings won’t solve the problem. Likewise, a perfectly compiled model won’t automatically produce a finished movie.
How to Choose the Right SFM Compile Workflow
Start with the result you need.
If you’re importing a custom character, focus on model compilation. If an environment created in Hammer won’t load, investigate map compilation. If the scene already plays correctly but you need a finished video, work on rendering and exporting.
This simple check prevents a lot of wasted effort. You don’t need every tool for every task, and you shouldn’t troubleshoot a rendering problem as though it were a model compiler error.
How to Compile a Custom Model for SFM (Step-by-Step)
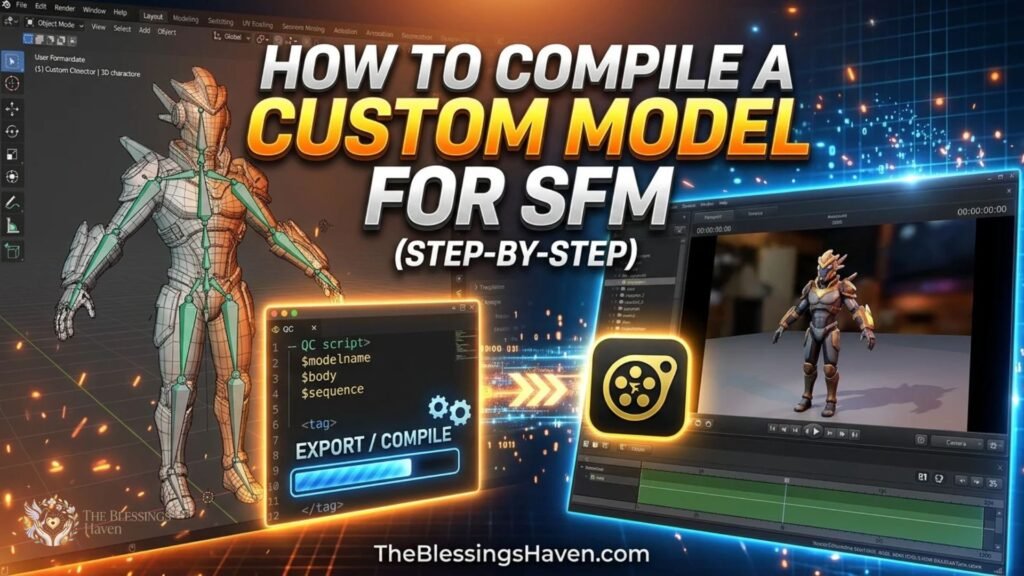
Creating a custom model involves more than exporting a 3D object. Geometry, materials, skeletons, model instructions, and file locations all need to work together.
The following workflow is suitable for a typical custom model, although character models with complex rigs or multiple animations may require additional preparation.
1. Prepare and Export Your Mesh (SMD or DMX)
Begin by preparing the model in a 3D application such as Blender. Remove unnecessary geometry, check the mesh normals, confirm the scale, and make sure the object is positioned correctly.
For an animated character, check the armature and bone weights. A mesh may look fine in Blender but deform incorrectly when its skeleton is used in SFM. Apply the appropriate transformations and verify that the reference mesh and animation skeleton are compatible.
You’ll generally need a supported export workflow for SMD or DMX files. The community-developed Blender Source Tools project is one option for working with Source model formats.
Export the reference geometry first. If the model requires animations, export those as well. Keep the files together in a clearly named working directory so you can find them when configuring the compiler.
Before proceeding, confirm that the geometry is intact and the export contains the information needed for your model.
2. Convert Textures to VTF and Create VMT Files
A model can compile successfully and still appear incorrectly because its materials aren’t configured properly.
Source uses a material system that separates the texture image from the instructions describing how it should be rendered. VTF stores texture data, while VMT defines the material properties and points to the relevant texture.
You can prepare textures in an image editor and convert them using a suitable tool, such as VTFEdit, or another compatible workflow.
Next, create a VMT file for each required material. Its shader and parameters must suit the asset. A typical model material may use VertexLitGeneric, while many ordinary world surfaces use LightmappedGeneric.
Check the $basetexture path carefully. It should point to the texture’s location relative to the game’s materials directory, rather than to an arbitrary folder on your computer.
Valve Developer Union’s material system explanation provides useful background on how VTF textures and VMT material definitions work together.
3. Write a QC Script (With Minimal Template)
A QC file tells the model compiler how to assemble the asset. It defines information such as the output model name, source geometry, material directory, and animation sequences.
For a simple model, the key instructions commonly include $modelname, $body or another appropriate geometry directive, $cdmaterials, and a suitable $sequence definition.
For example, the configuration might reference props/custom_model.mdl as the output model, use custom_model.smd as the reference geometry, and point $cdmaterials to models/props.
These values are examples, not a complete universal QC file. Your actual script must match your exported filenames, model structure, material paths, and animation requirements. A character with several sequences needs a more involved configuration than a static prop.
Use consistent names and relative paths. A typo in the QC file can prevent compilation or produce an asset that loads without all its expected components.
4. Compile with Crowbar (or StudioMDL)
Crowbar is a community tool for working with Source and GoldSource assets. It provides a convenient interface for model compilation and related modding tasks. StudioMDL is the underlying model compiler used by the relevant Source toolchain.
Download Crowbar from its official project repository, and make sure the version and compiler configuration suit your target environment.
The general process is straightforward:
- Open Crowbar and select its compile function.
- Configure the correct game or SFM directory and compiler paths.
- Select the QC file you created.
- Confirm the output location and any required settings.
- Start the compile and read the log.
Don’t assume that selecting a QC file is enough. The compiler must use the correct environment and be able to locate the referenced source files.
If compilation fails, read the first meaningful error in the log. Missing files, invalid directives, and incorrect paths often explain the failure more clearly than the final error message does.
5. Test in Half-Life Model Viewer (HLMV) Before SFM
When compilation finishes, open the model in Half-Life Model Viewer if a compatible version is available.
Check the geometry, materials, skeleton, animations, and bounding information. Rotate the model and inspect it from different angles. For an animated character, test its sequences rather than judging it by a single static pose.
Look for missing textures, distorted geometry, incorrect proportions, or animation problems.
Testing before opening SFM makes troubleshooting easier because it helps separate basic model problems from issues related to the SFM session or mounted game content.
A successful compile log is useful, but it isn’t proof that the model looks or behaves correctly.
6. Move Files into the Correct SFM Folders
Place the compiled model and its associated files in the appropriate model directory within a mounted SFM game folder. Place its VMT and VTF files under the corresponding materials directory.
A compiled model generally relies on a set of companion files, not just the MDL file. Depending on the model and compiler branch, these may include VVD, VTX, PHY, or other supporting files.
Your QC instructions and material references determine how the files are organized. For example, the model name, $cdmaterials directory, and $basetexture path must agree with the folder structure.
Keep related files together and preserve their expected relative paths. Avoid copying files into random directories simply because SFM can see other custom assets there.
If the model uses content from another game or mod, check that the required content is mounted and available to the application.
7. Load the Model in Source Filmmaker
Open SFM and create or load a session. Use the model browser to locate the new model, then add it to your scene.
Inspect the character or prop in the viewport. Confirm that its materials render correctly, the proportions look right, and the model responds properly when you select its controls.
If the model doesn’t appear, check the output path, filename, game directory, and mounted content first. Depending on your setup, you may need to restart SFM or refresh its available content.
Don’t begin a complicated animation until the model works in a simple test scene. A few minutes of testing now can save hours of rework later.
How to Compile a Custom Map for SFM (VMF → BSP)
Custom maps require a different workflow from models. Hammer Editor is used to create the editable level, and the map is compiled into a BSP file that the target engine can load.
Compatibility is important. A BSP created for one Source Engine branch may depend on entities, materials, lighting behavior, or features that differ in another branch. Always confirm that the map and its content are suitable for your SFM setup.
1. Build Your Map in Hammer Editor and Save VMF
Create or open your level in a compatible version of Hammer Editor. The editable source map is commonly saved as a VMF file.
Before compiling, check the basic geometry, textures, entity placement, and lighting setup. Make sure the playable or visible space is properly enclosed where required and that custom assets have valid paths.
Save the VMF to a project folder you can locate easily. If you’re adapting a map from an existing game or mod, check its license and dependencies before using or distributing it.
2. Run VBSP, VVIS, and VRAD
The classic Source map compilation process uses three main tools.
- VBSP processes the map geometry and entities and creates the basic compiled level.
- VVIS calculates visibility information used to determine which areas should be rendered.
- VRAD calculates lighting, including radiosity and light bounces.
The exact behavior and available options vary by engine branch. Valve Developer Union’s introduction to Source mapping explains the roles of these tools.
For quick layout tests, some workflows allow simplified compiles with visibility or lighting steps skipped. That can speed up iteration, but it isn’t a substitute for a properly finished map. Lighting may be incomplete, shadows may be missing, or rendering performance may suffer.
For a final environment, use the appropriate compile settings for your target branch and inspect the output log before moving on.
3. Fix Common Map Compile Errors
A map can fail because of leaks, invalid geometry, missing assets, incompatible entities, or incorrect tool configuration.
A leak usually means the map’s enclosed space is open to the outside world somewhere it shouldn’t be. Use Hammer’s pointfile or other available diagnostics to trace the problem, then fix the geometry and compile again.
If a compile succeeds but the level looks wrong, investigate lighting, material paths, visibility data, and asset compatibility.
Don’t change several unrelated settings at once. Fix the earliest clear error, rerun the compile, and inspect the resulting map.
4. Load and Test the Map in SFM
Once the BSP is ready, put it in the maps directory used by the appropriate SFM game folder or mounted content setup. The exact location depends on your configuration.
Load the map in SFM and check whether the environment appears as expected. Inspect the lighting, materials, geometry, and any special entities you need for your scene.
A map may compile successfully yet still depend on assets that aren’t installed or mounted in SFM. Missing textures or models should therefore be investigated separately from errors in the BSP itself.
SFM Compile Tools You Need (And How to Set Them Up)
You don’t need to install every Source tool to complete every task. Choose based on the asset you’re working with.
| Tool | Main purpose |
|---|---|
| Crowbar | Compiling and working with Source models |
| StudioMDL | Compiling supported model source data through QC instructions |
| Blender with Source export tools | Preparing geometry, rigs, and animation data |
| VTFEdit or a compatible alternative | Converting and inspecting Source textures |
| Hammer Editor | Creating and editing maps |
| VBSP, VVIS, and VRAD | Compiling maps and processing visibility and lighting |
Start by confirming where your SFM installation is located. Then configure the tools to use the appropriate compiler binaries and game directories. Don’t assume that a path used for one Source game will automatically work for another.
Keep source files in a separate working folder and compiled assets in their intended game directories. This separation makes it easier to edit, recompile, and troubleshoot your work without losing the original files.
The broader Source Engine ecosystem shares underlying concepts, but tools and formats aren’t universally interchangeable across all engine branches.
You May Like to Read: Finance WWW Disquantified .org: 7 Helpful Facts You Should Know
Common SFM Compile Errors and How to Fix Them
Troubleshooting is easier when you identify the symptom before changing anything. A successful compile, a correctly installed asset, and a working SFM session are three different things.
Model Does Not Appear or Is Stuck in a T-Pose
If a model doesn’t appear in the browser, check its output directory, model name, mounted game folder, and required companion files.
If an animated character remains in a T-pose, inspect its skeleton and animation sequences. The animation data may not match the reference model, or the QC file may reference the wrong sequence file.
Test the model in a compatible viewer before changing your SFM animation settings.
Purple-and-Black Textures or Missing Materials
Purple-and-black checkerboard textures usually indicate a missing or unresolved material or texture.
Check that the VMT exists, that its $basetexture points to the correct VTF, and that both files are under the appropriate materials directory. Also inspect capitalization and subfolder names in the paths.
A model’s geometry can be perfectly fine even when its materials are broken. Fix the material references rather than recompiling the entire model repeatedly without a clear reason.
QC Script and StudioMDL Compilation Errors
Read the compilation log and look for the earliest actionable error. Verify that all referenced SMD or DMX files exist and that their names match the QC script.
Check model directives, sequence definitions, material directories, and output paths. Special characters or unexpected folder structures can also cause issues with particular tool configurations.
Warnings aren’t always fatal, so distinguish them from errors that stop the compile or produce an unusable model.
Map Leaks, Dark Lighting, and Failed Map Compiles
For a map leak, inspect the pointfile and repair the opening or misplaced geometry. For dark or missing lighting, check whether VRAD completed successfully and whether the BSP was built with the intended options.
If the map appears blank or contains missing assets, verify that it is compatible with your SFM environment and that its dependencies are available.
A successful VBSP stage alone doesn’t guarantee that all lighting, visibility, and custom content is ready.
Rendering Crashes or Missing Audio
Rendering problems usually require a different set of checks. Confirm that the export range, destination folder, render settings, and available disk space are appropriate.
For missing audio, verify that the session actually contains the required sound elements and that you’ve chosen an export method that includes or separately outputs audio. When exporting an image sequence, remember that the sound may be produced as a separate file.
Test a short section before rendering the entire project. If the short export works, you’ll have a better starting point for diagnosing problems with a larger render.
Exporting and Rendering: “Compiling” Your Final SFM Animation
Once the scene is ready, rendering turns the timeline into a finished visual output. The right settings depend on your target resolution, frame rate, effects, and intended delivery format.
Render Settings for Quality
Check the camera, shot range, lighting, materials, and animation before the final export. Preview the important shots to catch clipping, awkward character movements, and visual effects that don’t behave as expected.
Higher-quality render settings can improve the output, but they also increase processing time. Change settings deliberately and render a short test when you’re unsure how the result will look.
Avoid assuming that a sharper image alone guarantees quality. Good lighting, clear composition, consistent materials, and well-timed animation matter just as much.
Export Movie vs. Image Sequence (PNG/TGA) + Audio
Source Filmmaker offers movie and image-based export workflows, although available formats and behavior can depend on the installation.
A direct movie export is convenient because it aims to produce a single video file. However, for a reliable production workflow, exporting an image sequence is often preferable.
With an image sequence, each rendered frame is saved as a separate image, while audio can be exported separately. You can then combine the frames and sound in a video editor and choose the final video format and compression settings.
This approach also makes revisions easier. If you need to correct part of a scene, you may be able to render the affected shots again instead of repeating the entire export.
PNG is a useful choice when you want lossless image compression. TGA is another option supported by many graphics and video workflows. Choose the format that suits your available tools and storage space.
Keep image sequences in clearly named folders, and confirm that the files remain in chronological order. When assembling them in an editor, use the frame rate from your SFM session.
Resolution and Frame Rate
Choose your resolution before rendering the full sequence. A common target for online video is 1920 × 1080, but larger resolutions may suit projects intended for higher-resolution displays.
Higher resolutions require more processing and storage. They won’t automatically fix low-quality textures, poor lighting, or weak composition.
Frame rate deserves the same care. Choose an appropriate rate for the intended project and keep it consistent through export and editing. If SFM renders a sequence at one frame rate but your video editor interprets it at another, the finished animation may play too quickly, too slowly, or with incorrect timing.
Before committing to a long render, export a representative section and check image quality, motion, sound synchronization, and the final dimensions.
Best Practices and Workflow Tips for Reliable SFM Compiles
A consistent workflow makes SFM work much easier to manage, particularly when you’re dealing with several custom models, maps, or animation revisions.
Keep original source files, compiled outputs, and final renders in separate folders. Use descriptive filenames and avoid overwriting working assets until you’ve tested the new versions.
Check paths before compiling. Many problems that appear to involve broken software actually come from a missing file, the wrong output directory, or a material reference that points to the wrong location.
Test assets individually before adding them to a large project. Verify a custom model in a model viewer, test a map in SFM, and render a short animation segment before starting the complete export.
Finally, keep copies of working QC files and note the settings that produced a successful model or map. When something breaks after an edit, you can compare the new version with the last known working one rather than starting from scratch.
FAQ: SFM Compile Questions Answered
What does SFM Compile mean?
SFM Compile can mean compiling custom models or maps for Source Filmmaker, or rendering a completed animation. Model and map compilation prepare assets for the engine, while rendering produces the frames and audio used in the final movie.
How do you compile a custom model for SFM?
Prepare and export the model in a supported format, configure its materials, create a QC file, and compile it using Crowbar or a compatible StudioMDL setup. Then test the output, move its files into the correct directories, and load it in SFM.
Is Crowbar required to compile SFM models?
No. Crowbar is a popular community tool, but compatible StudioMDL workflows can also compile models. The appropriate choice depends on the model format, toolchain, and Source Engine environment.
Why are my SFM textures purple and black?
This usually indicates a missing texture or unresolved material. Check the VMT file, its texture reference, the VTF file’s location, and the capitalization and spelling of the material paths.
Where should compiled models go in Source Filmmaker?
Place the model and its required companion files in the appropriate models directory within a mounted SFM game folder. Its VMT and VTF files belong in the corresponding materials directory. The correct locations depend on the model’s configured paths and your installation.
What is the difference between VMF and BSP?
VMF is the editable source-map format used by Hammer Editor. BSP is the compiled map format that a compatible Source Engine environment can load. The VMF is the project source; the BSP is the compiled result.
Is compiling a model the same as rendering an SFM animation?
No. Model compilation prepares an asset for use in SFM. Rendering processes the animation and produces a video or image sequence, with audio handled according to the selected export workflow.
Conclusion
SFM Compile becomes much easier to understand when you separate asset preparation from final rendering. Custom models need compatible geometry, working materials, valid QC instructions, and correct file paths. Custom maps need the right Hammer workflow and a successful, compatible BSP compile. Finished animations need appropriate render settings and a dependable export process.
The best approach is to test each stage before moving to the next. Read compiler logs, verify asset paths, inspect models before importing them, and render short sections before exporting an entire animation.
Once you understand which process you’re dealing with, you can solve problems more methodically and spend less time repeating failed compiles.

Welcome to The Blessings Haven! Rathna is a passionate content creator sharing heartfelt blessings, inspirational quotes, prayers, and meaningful wishes, along with helpful technology articles, digital trends, and online guides.